Explore the spaces, connections, and details of one Lone Creek custom home.
MOUNTAIN MODERN · CUSTOM RESIDENCE
One home. Many ways to live.
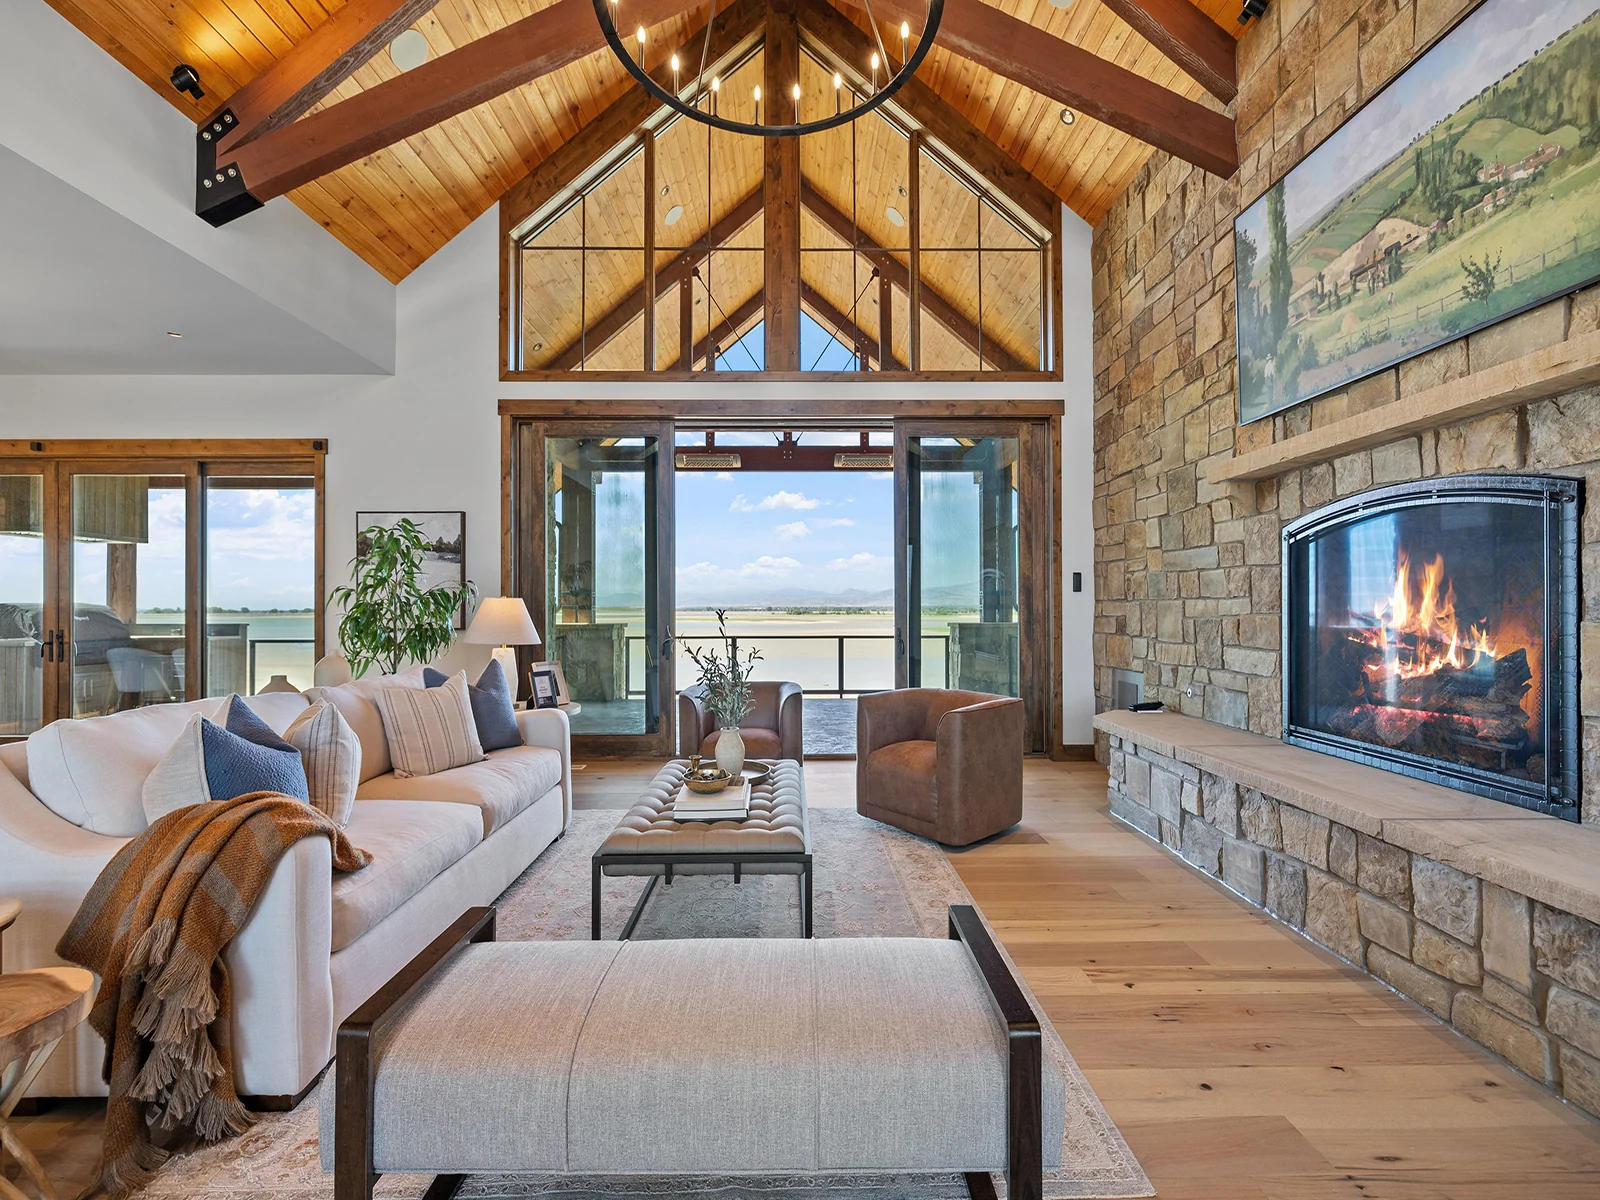
Exposed timber, stone, and generous glazing give this home its character. Gathering spaces connect to the outdoors, while quieter rooms offer places to retreat.
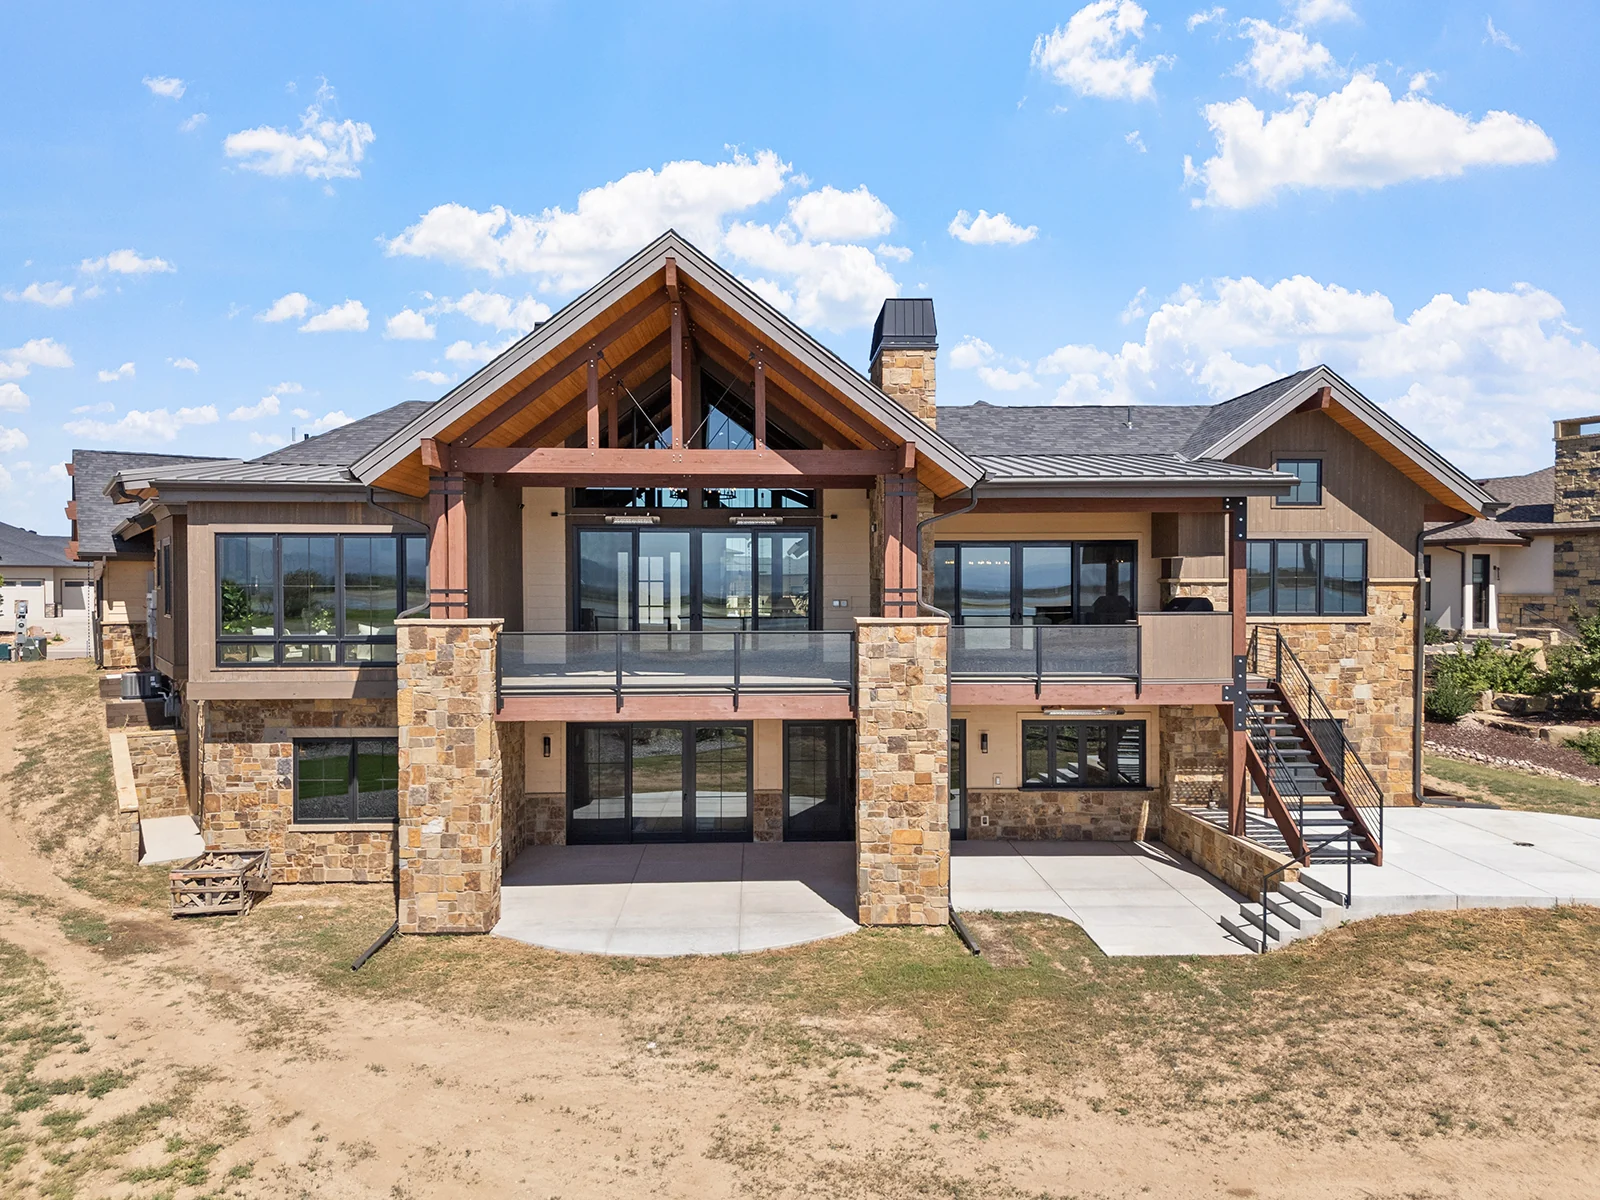
These photographs show a single residence. Explore the rooms individually or open the gallery for a closer look.
ONE HOME. A CLOSER UNDERSTANDING.
Behind the walls. Beyond the photograph.
Explore the structure, the preparation beneath the slab, and the thinking behind the kitchen. Five stories from the same Lone Creek residence.
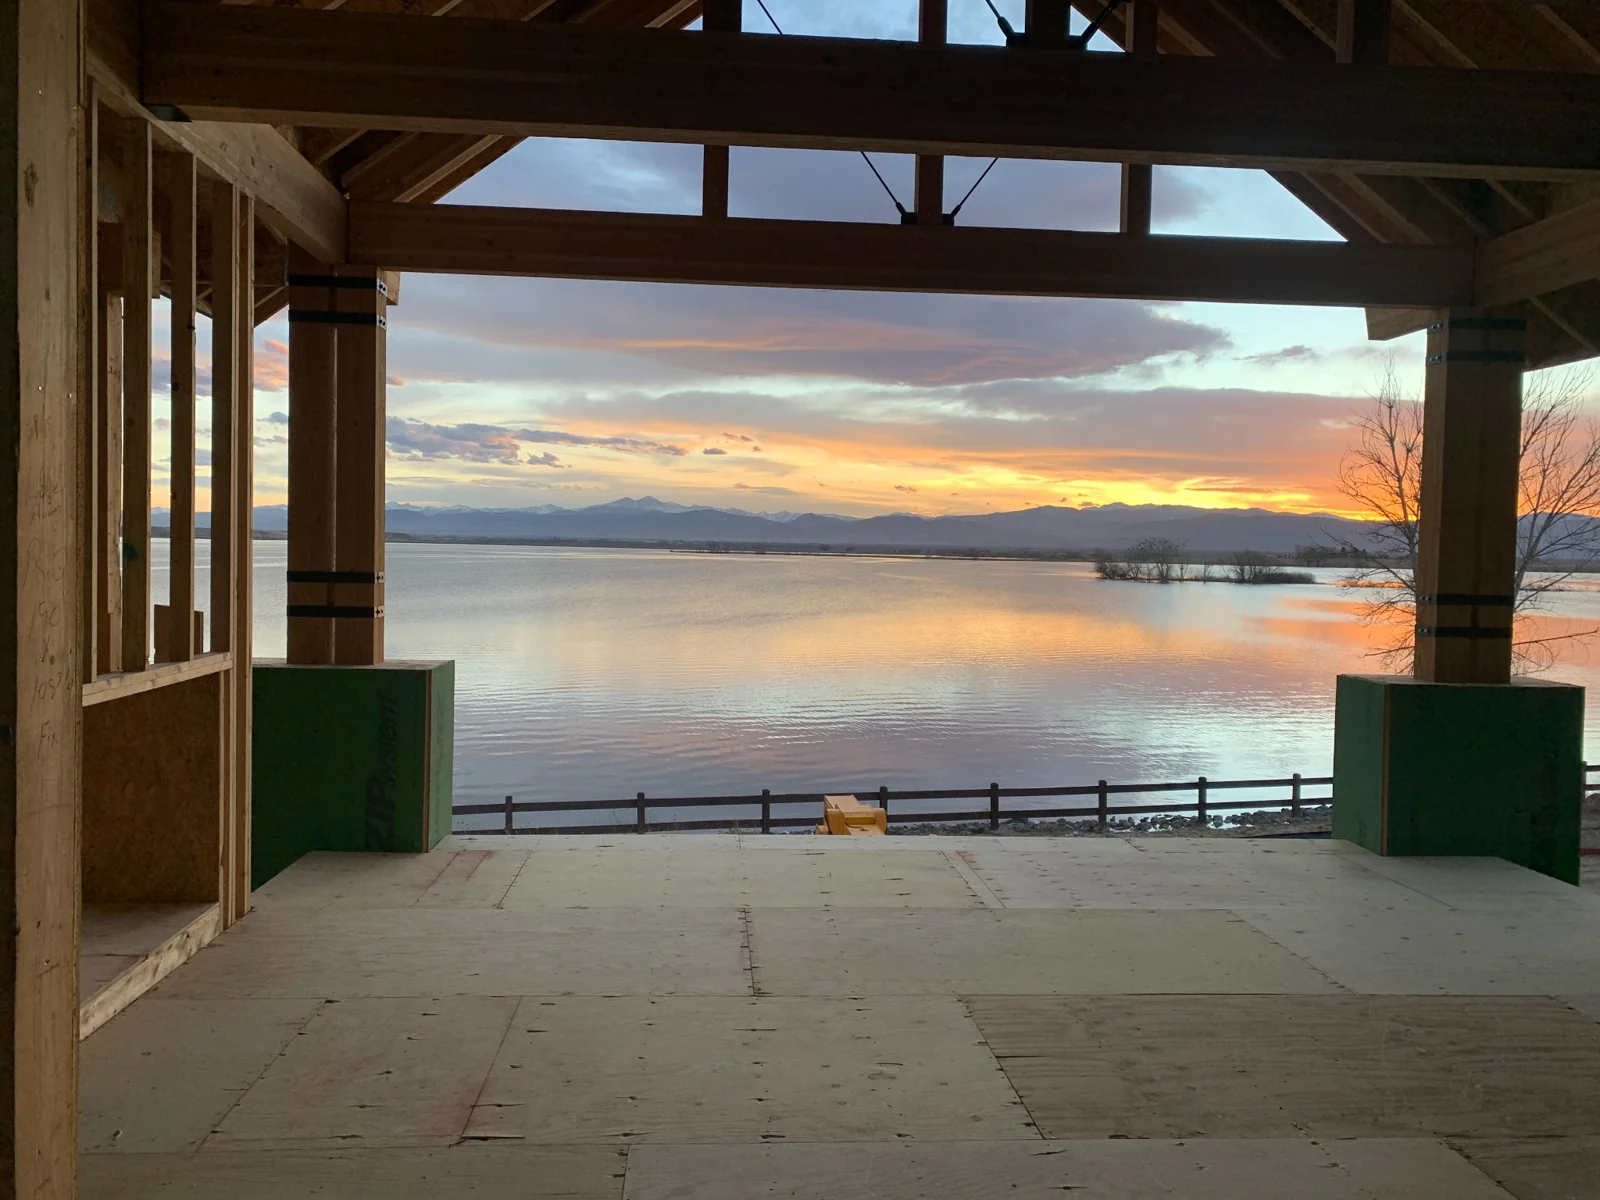
01 / DURING CONSTRUCTIONThe great room before finishes, with the plywood subfloor and timber structure still visible.02 / COMPLETED HOMEThe completed great room, photographed from a different viewpoint.
01 / THE GREAT ROOM
The room begins before the finishes.
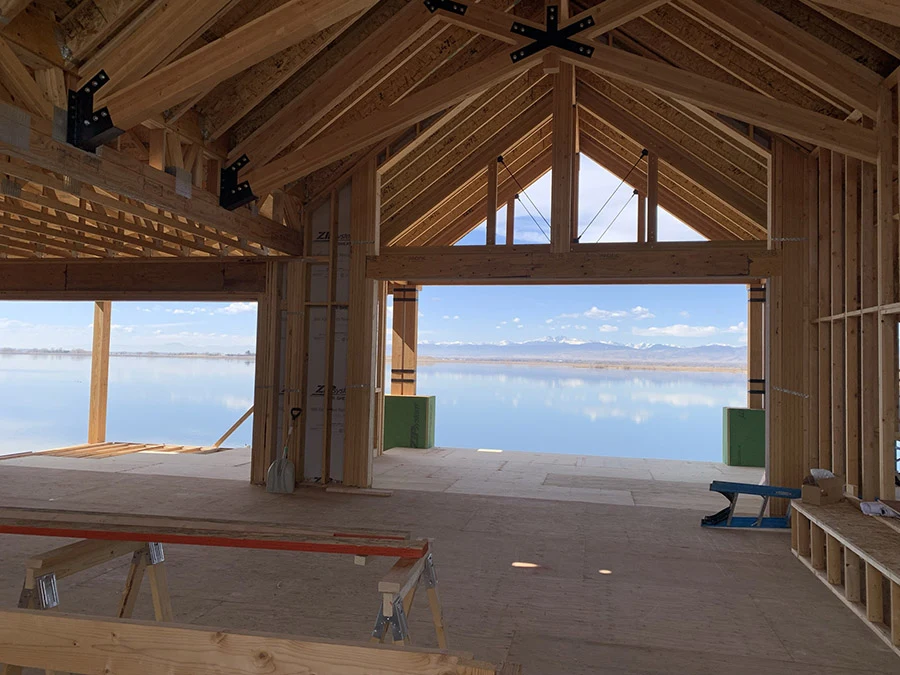
The timber and lake-facing openings give this room its character. Beneath your feet, another deliberate choice helps give it substance: a 1⅛-inch plywood subfloor, forming a sturdy base beneath the finished flooring.
A detail to notice
Look beyond the timber roofline to the plywood deck in the construction photograph. For this home, we selected 1⅛-inch plywood as part of a floor system built for strength, stiffness, and lasting everyday use.
Why it matters
A room should feel as considered as it looks. The subfloor contributes to a solid feel underfoot and provides support for the finished flooring above. It is a construction decision you may never see again, but one that helps shape the experience of living in the room.
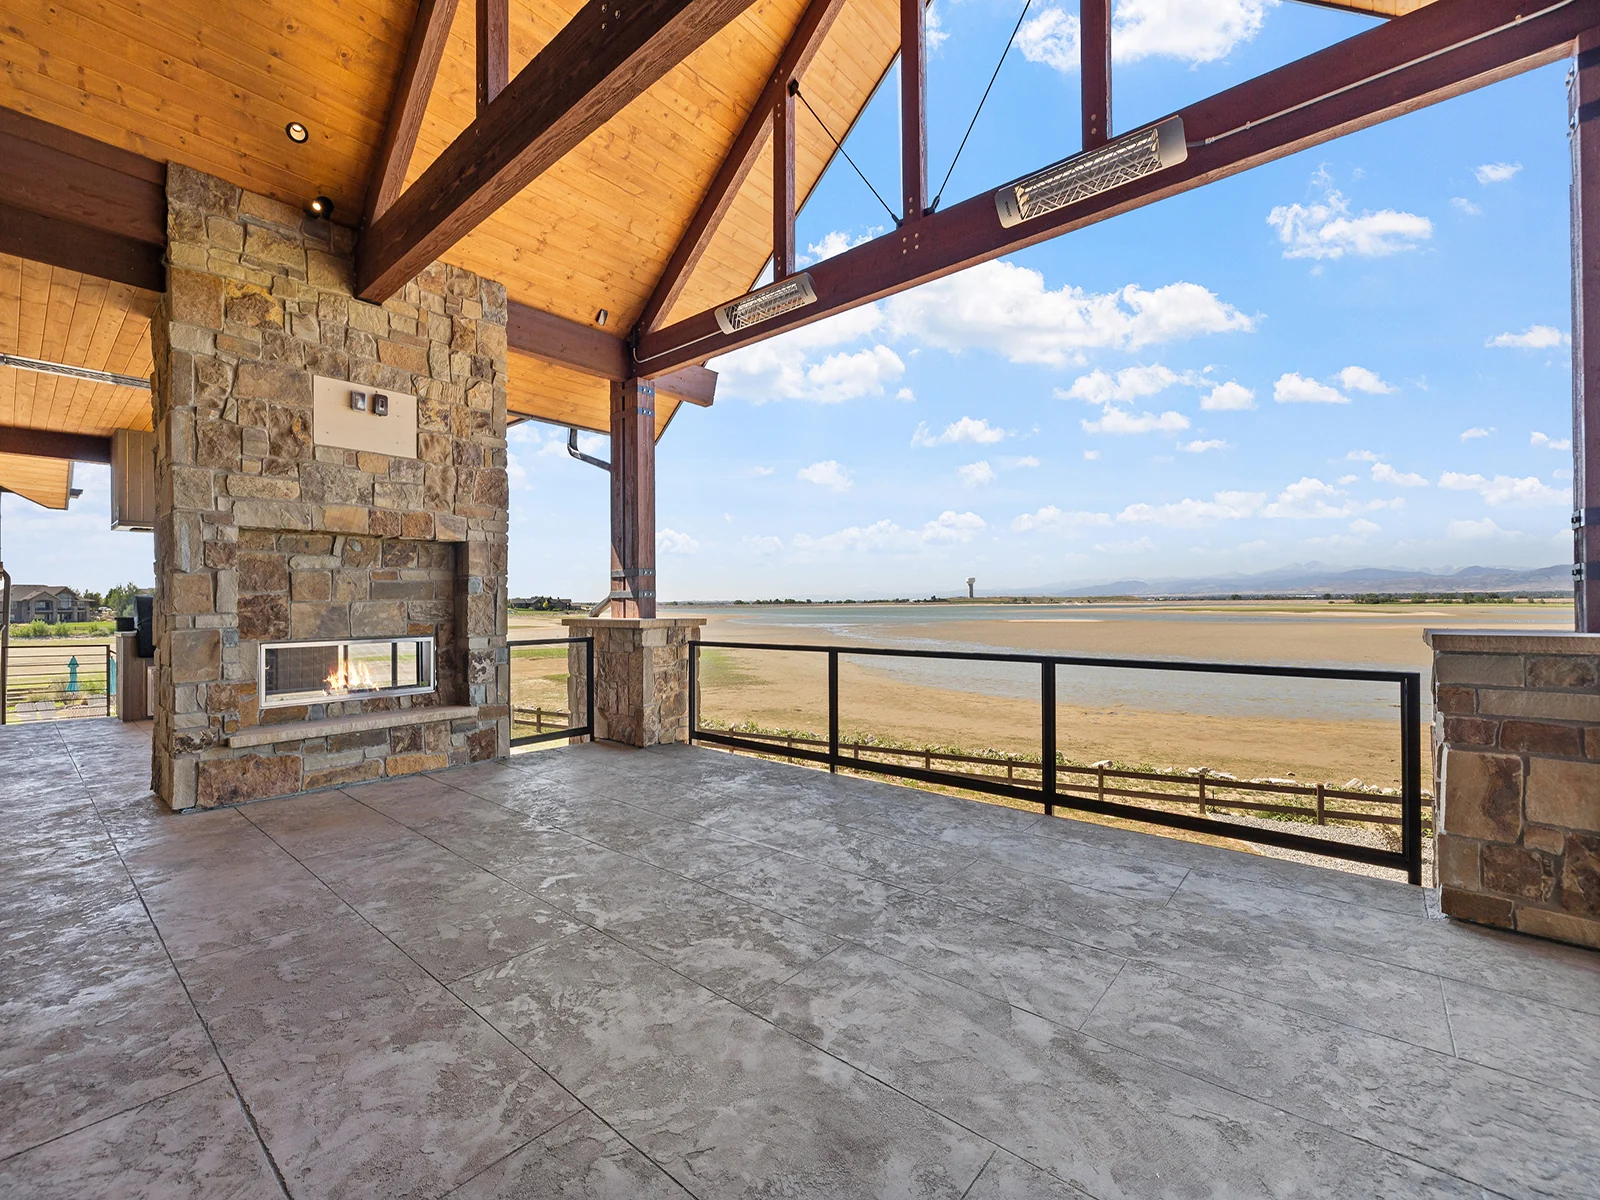
01 / DURING CONSTRUCTIONThe covered outdoor space during construction, looking toward the lake.02 / COMPLETED HOMEThe completed covered terrace, photographed from a different viewpoint.
02 / OUTDOOR LIVING
A place to pause. A connection to the setting.
The lake view is present long before the finishes. The construction and completed photographs show the timber-covered outdoor space at two different stages.
A detail to notice
Look at the timber posts, roof structure, and open edge toward the water. In the completed terrace, those elements sit alongside the stone fireplace and finished surfaces.
Why it matters
Outdoor living deserves the same early consideration as the rooms inside: how you reach it, where you gather, and how the space relates to its surroundings.
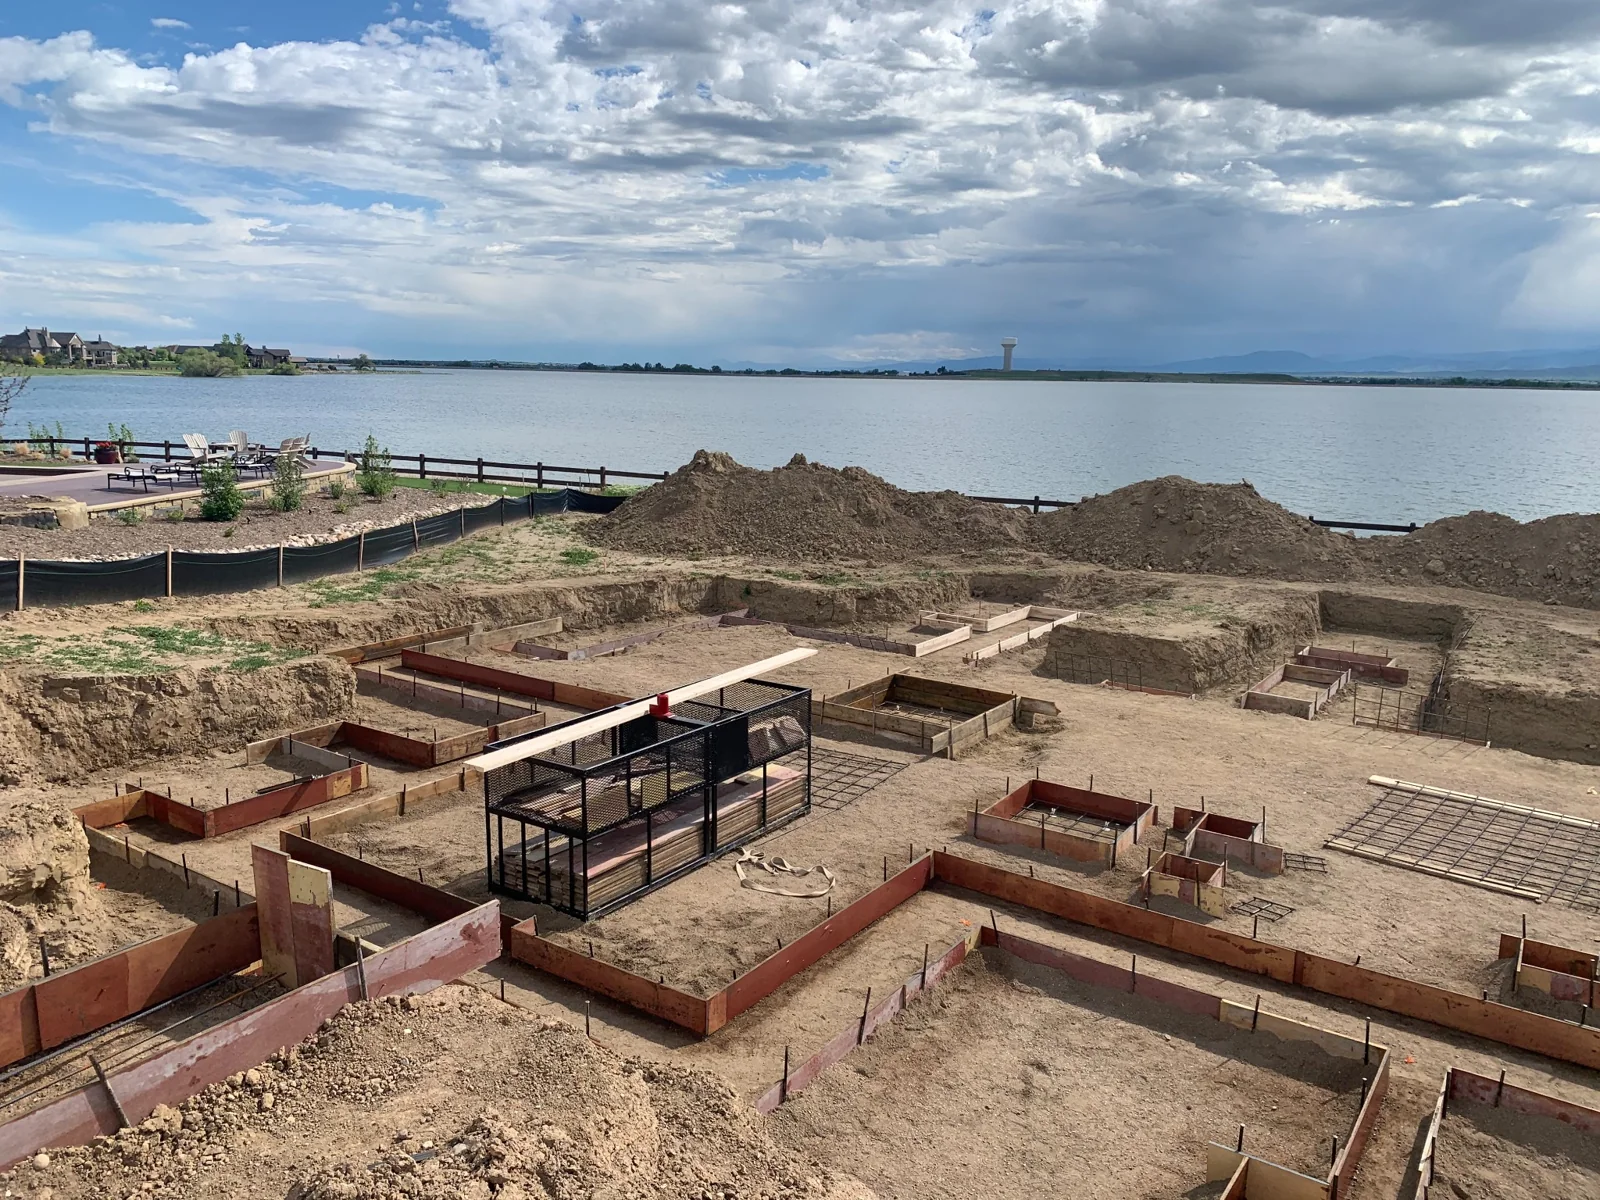
01 / DURING CONSTRUCTIONFooting layout during the early construction of this residence.02 / COMPLETED HOMEThe completed lake-facing exterior of the same home.
03 / FROM THE GROUND UP
Before there is a home, there is a homesite.
The early footing layout and the completed lake-facing exterior tell different chapters of the same home. What starts as lines on the ground becomes rooms, levels, and places to gather.
A detail to notice
The foundation photograph shows the layout before walls and roofs define the home. The completed rear exterior reveals how the spaces and outdoor areas come together.
Why it matters
The property is part of the project. Site conditions, access, utilities, and the proposed layout deserve attention before the finished appearance takes center stage.
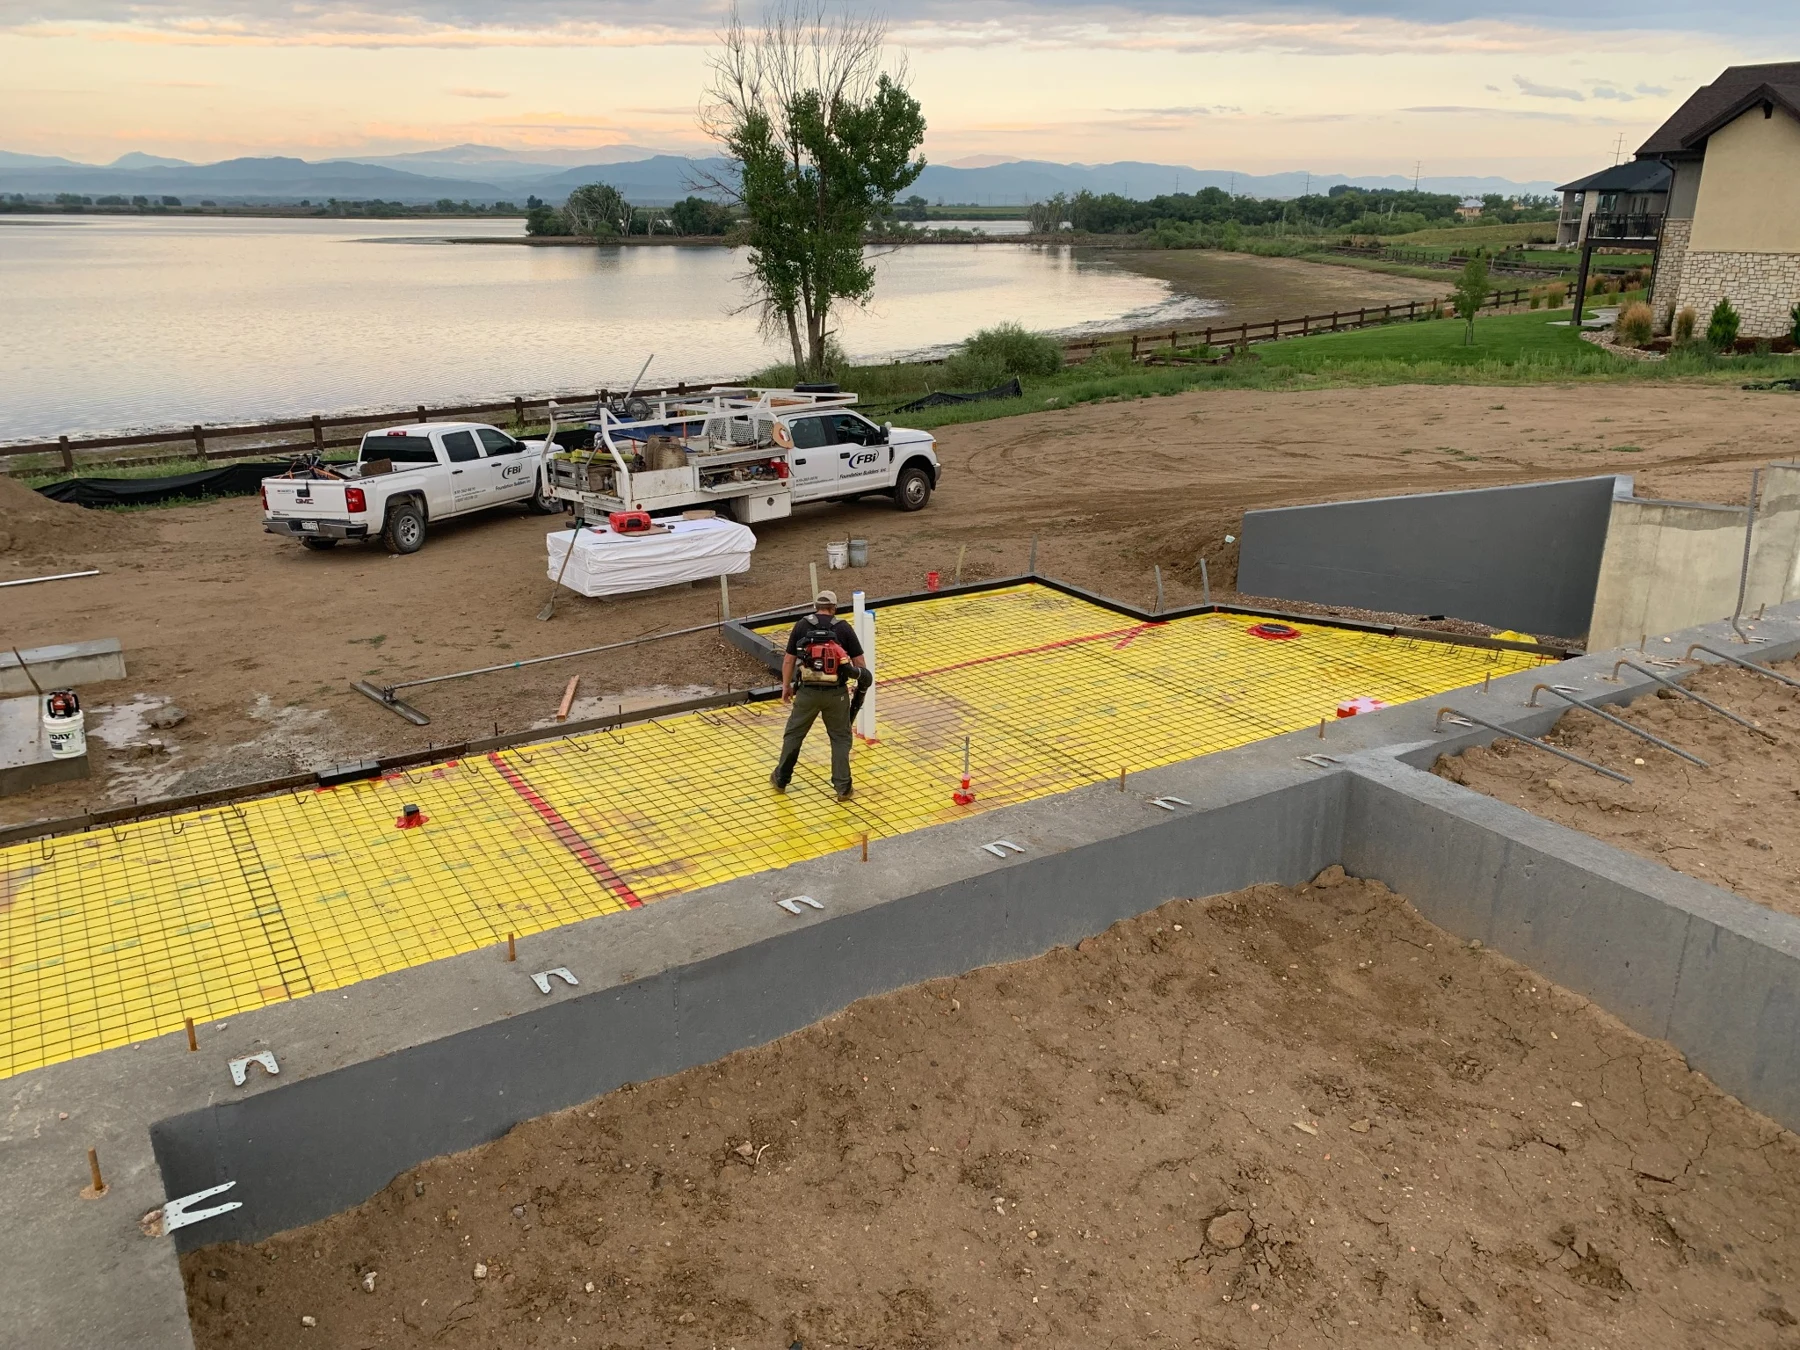
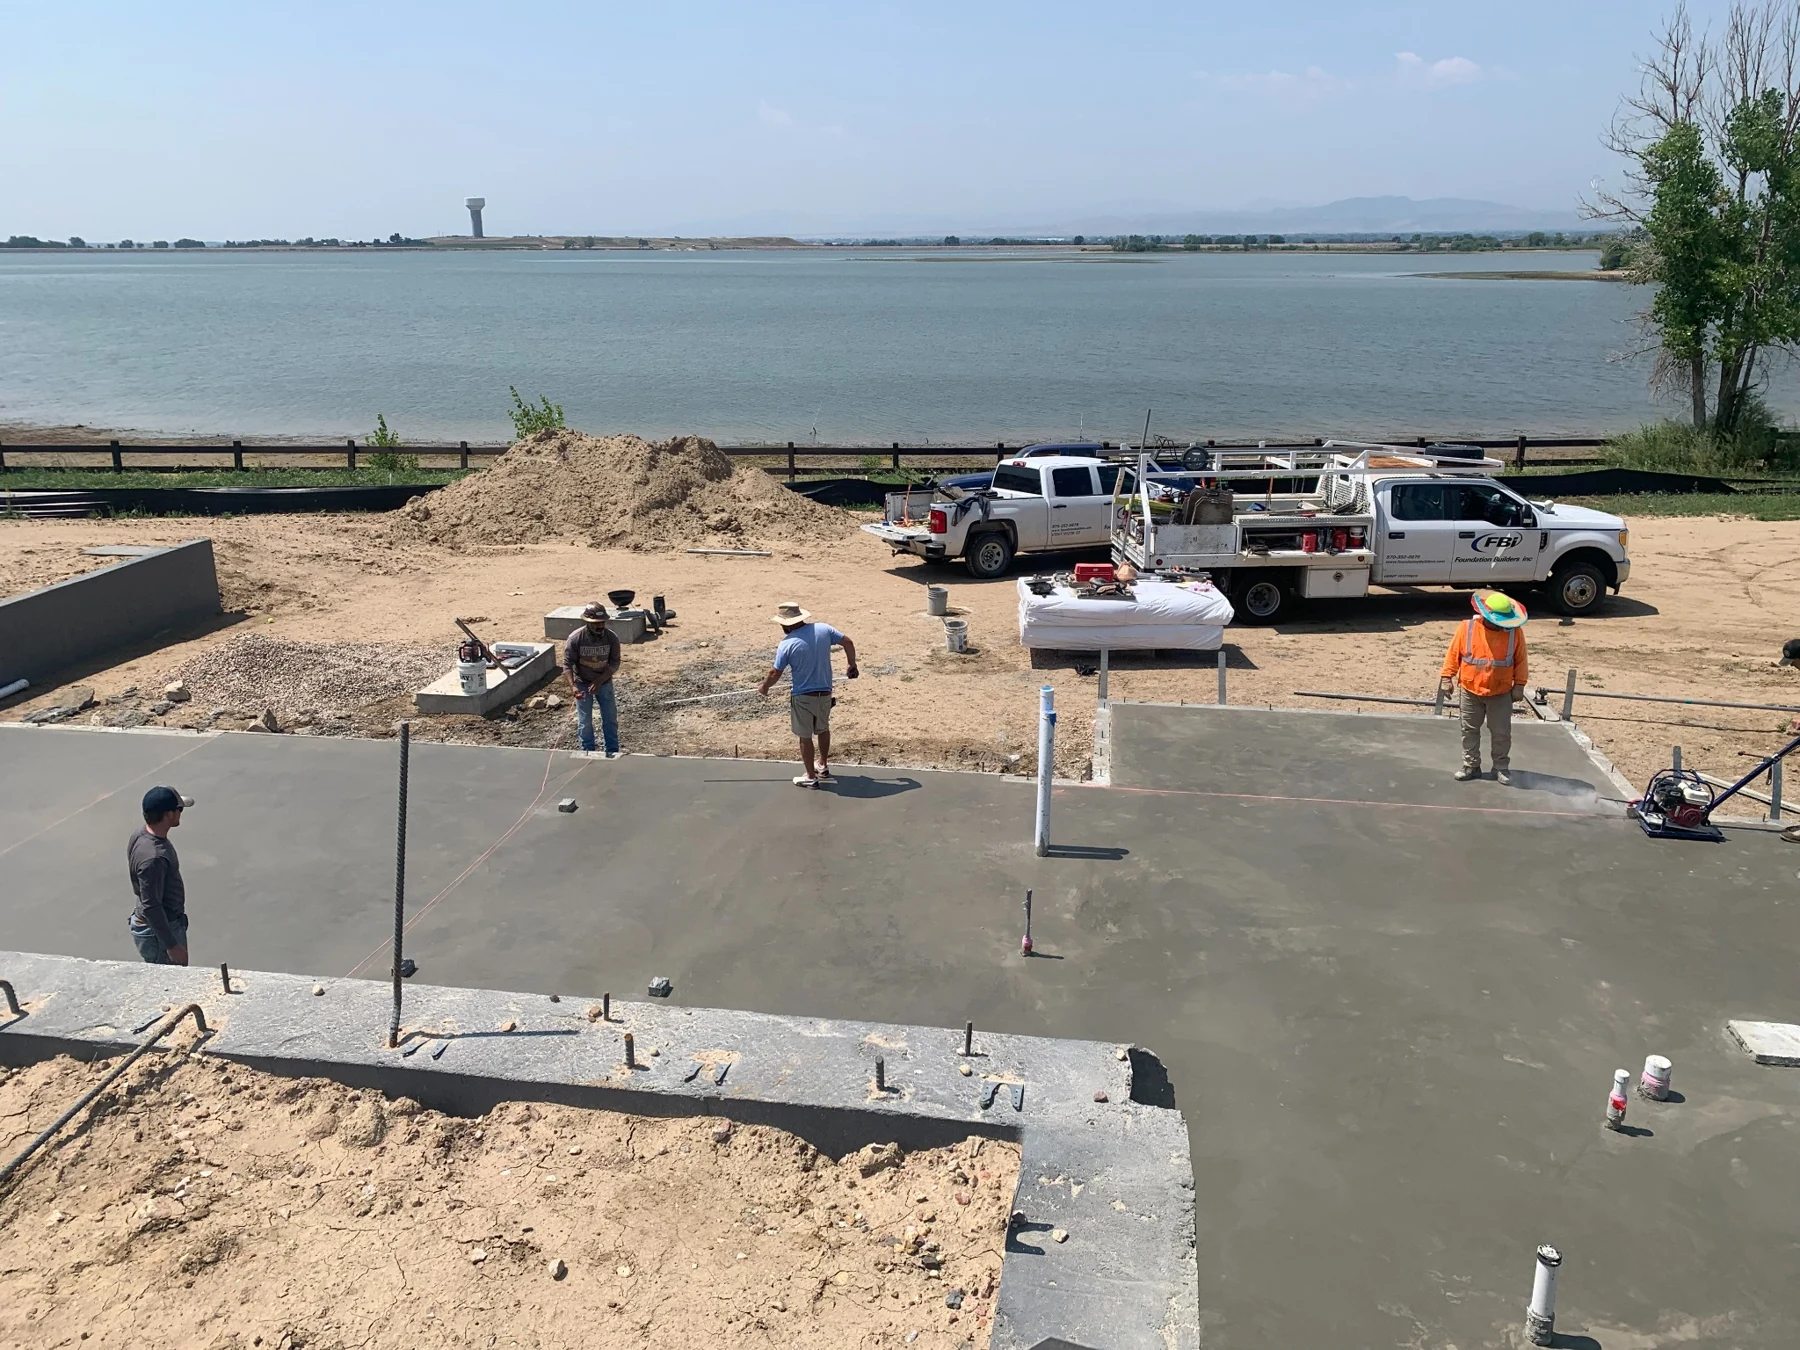
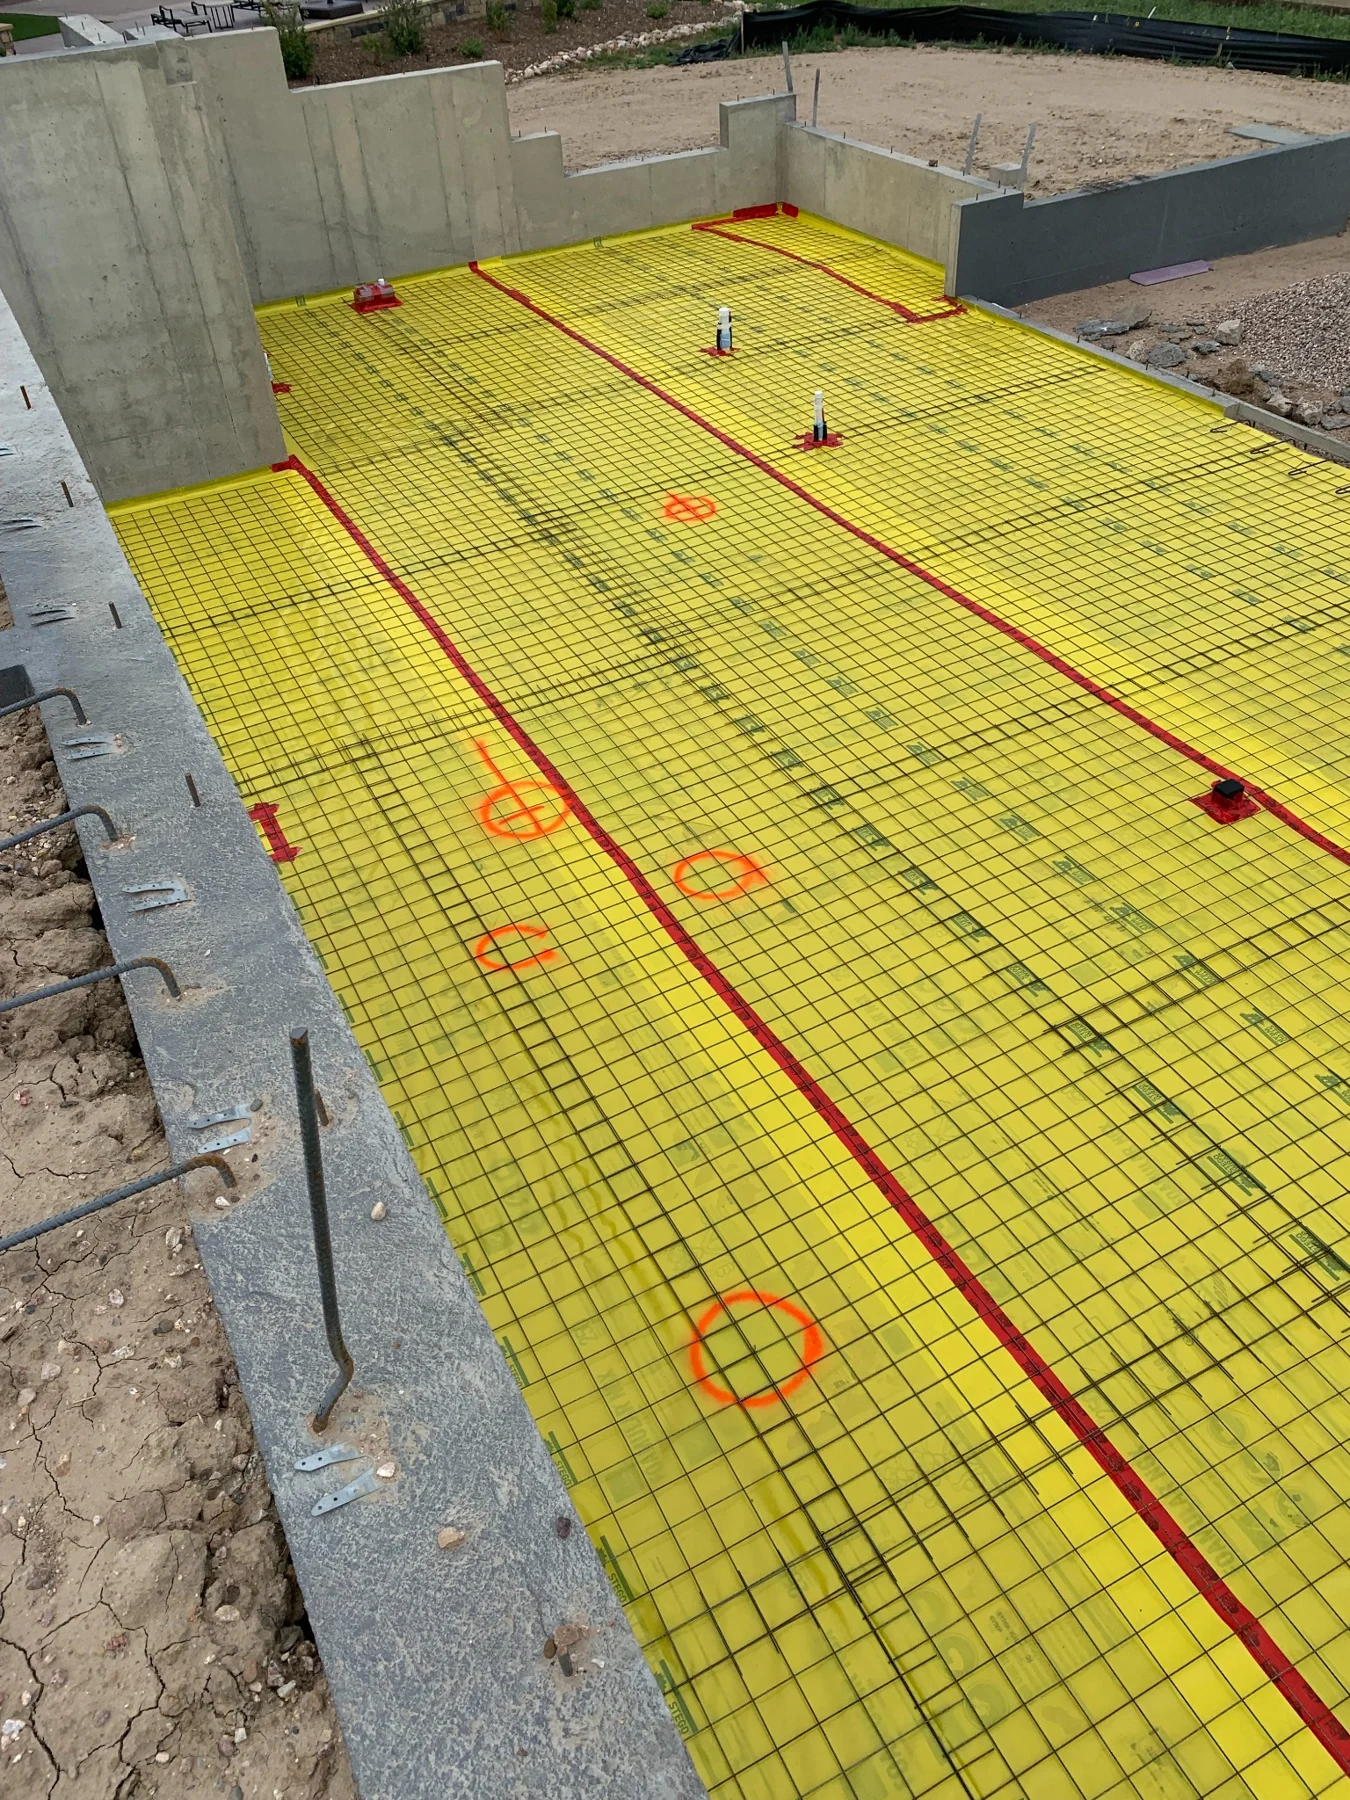
01 / BEFORE THE POURThe interior slab area before the pour. Follow the pipe penetrations and foundation edges into the concrete-finishing photograph.02 / CONCRETE FINISHINGThe same interior slab area during concrete finishing. The pipe locations connect the two stages; the vapor barrier is now concealed beneath the concrete.
04 / BENEATH THE SLAB
Protection begins beneath the surface.
Long before the flooring goes in, we make decisions about the moisture below it. For this home, we used 15-mil Stego Wrap beneath the slabs, including the garages—a deliberate part of our approach to moisture management.
A detail to notice
The yellow membrane sits beneath the concrete. Look at the red tape along the seams and around the pipe penetrations: the connections are part of the story, alongside the material itself.
Why it matters
A below-slab vapor barrier helps limit ground moisture vapor entering the concrete. That matters for the spaces above and for moisture-sensitive finishes, including garage floor coatings. It is one part of protecting the finished surface, planned before the pour.
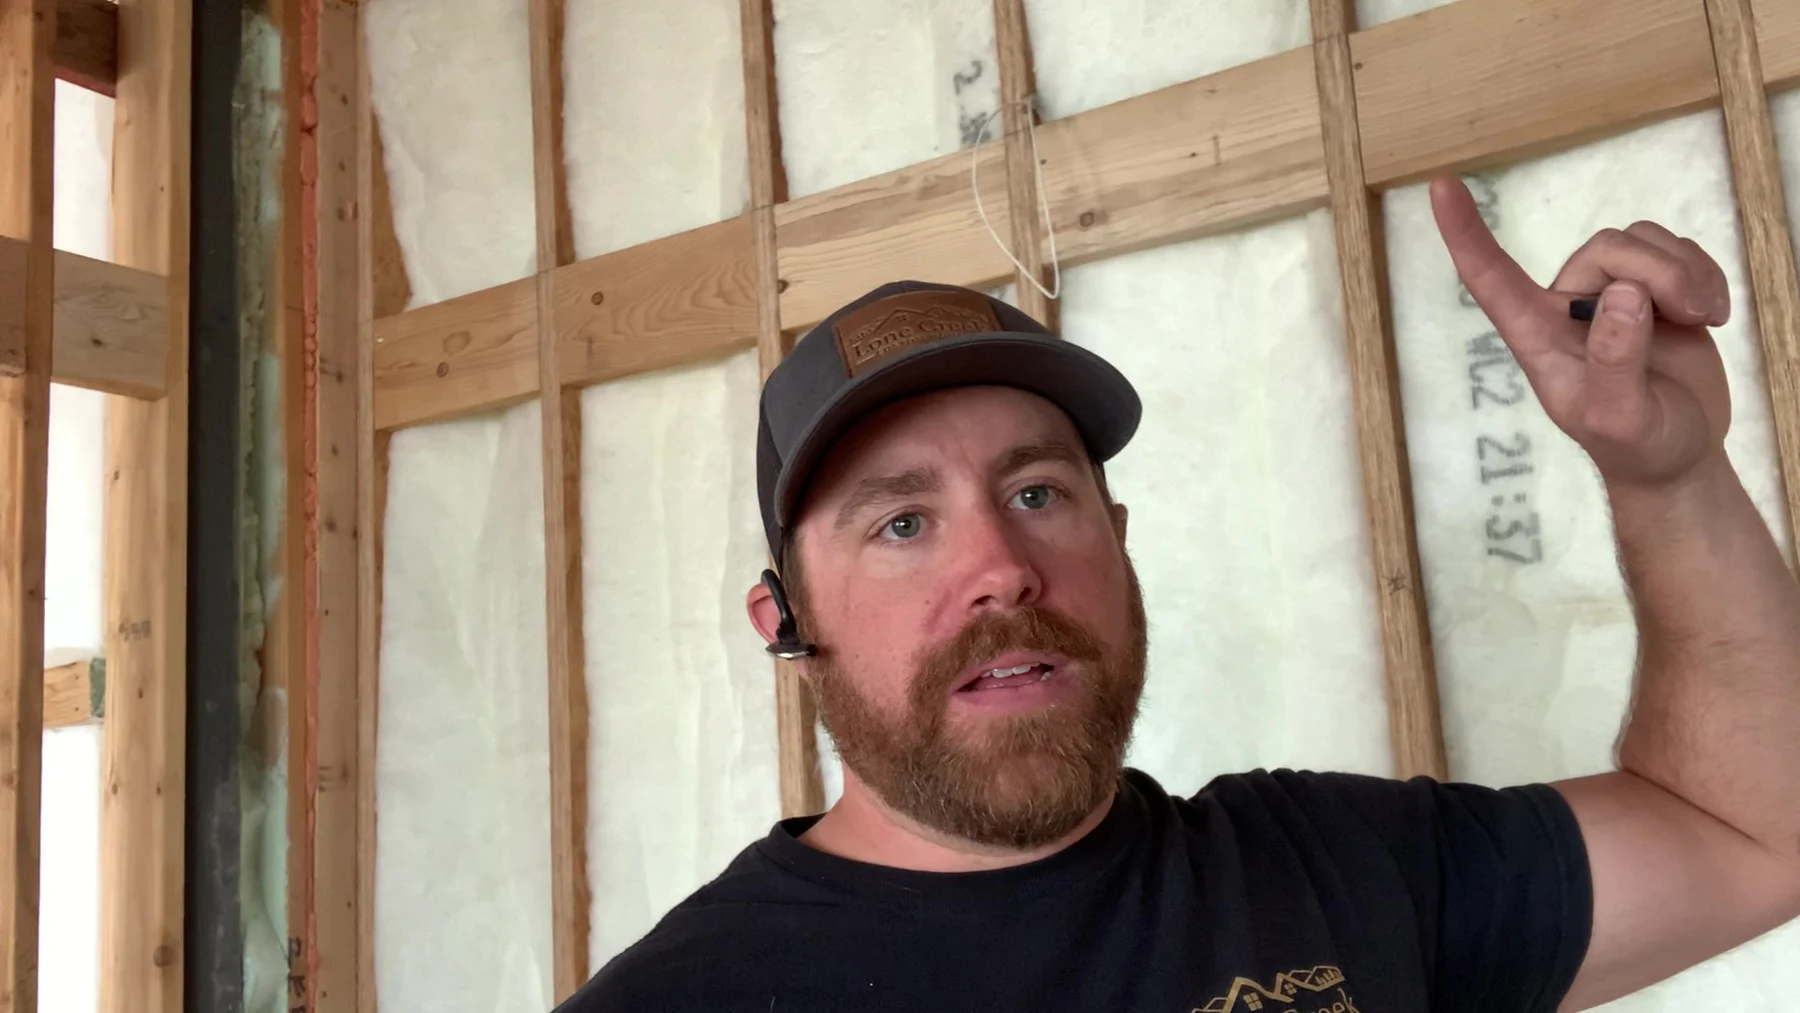
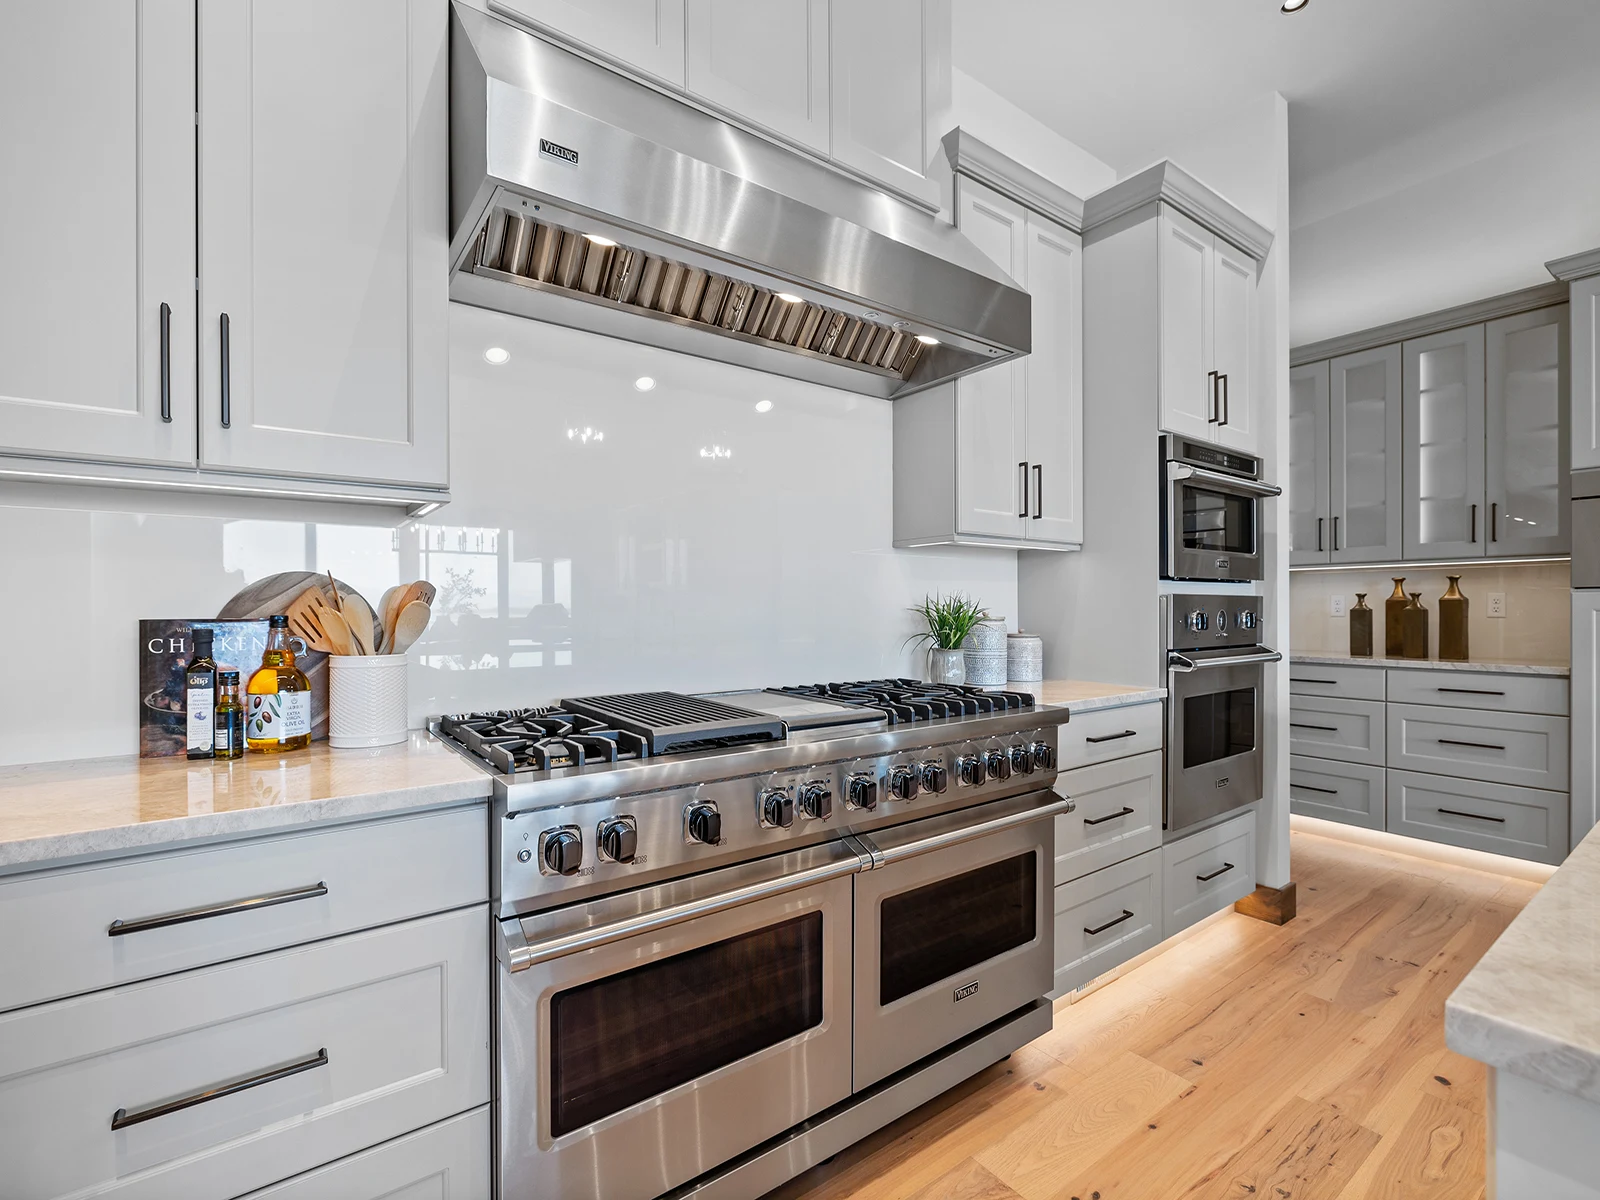
01 / DURING CONSTRUCTIONA still from David’s construction walkthrough, showing the blocking before drywall. The completed photograph shows this same range wall from a different viewpoint.02 / COMPLETED HOMEThe same wall after completion: the range, hood, and surrounding cabinetry. The backing David points out is now concealed behind the finishes.
05 / THE KITCHEN
The support you see. The care you don’t.
A finished kitchen draws your eye to cabinetry, surfaces, and light. The precision begins with the wall behind them. Here, David shows the cabinet blocking alongside engineered LSL studs before drywall conceals the preparation.
A detail to notice
The vertical 2×4 studs are laminated strand lumber, or LSL: engineered wood selected for its strength, consistent straightness, and dimensional stability. The horizontal blocking between them provides planned attachment locations for the cabinetry.
Why it matters
Straight, stable framing gives cabinet installation and finish carpentry a consistent starting point. Paired with deliberately placed blocking, it creates a well-prepared wall for mounting and fitting the cabinetry around the range and hood. The finished result begins long before the cabinets arrive.
A GOOD PLACE TO BEGIN
What does home mean to you?
Let’s explore the spaces, details, and priorities that will shape yours.